This is a "one-screen-captures-all" method of entering the required data for a record, and uses a unique, unobtrusive 'wizard' for recalling/creating client s.
In the early stages of working with a client, you will often not have all the information relating to either the client, or their issue. Therefore, at this stage, Ivo only requires a minimum of mandatory data - such as a brief title, date, funding source etc. Depending on the funding source selected, one or two additional fields of data may also be required.
The left side of this screen is devoted to locating the correct client for the issue. The right side is devoted to the details of the issue.
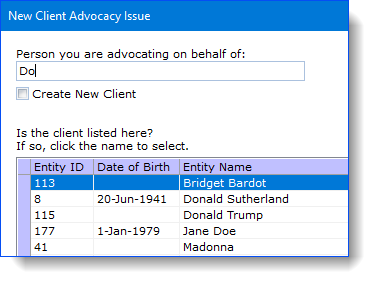
When you start typing the client's name, Ivo performs an instant search based on your every keystroke after the first two letters. If you type "Do", Ivo will offer you a choice of clients who are already in the system:
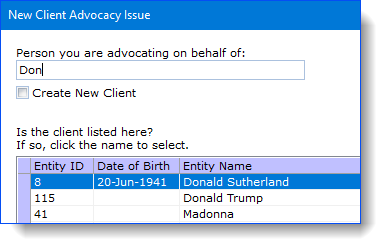
If you keep typing, so your entry says 'Don', the names with "Do" drop out of the suggested matching names, leaving only those names that contain the letters "Don" anywhere in the name:
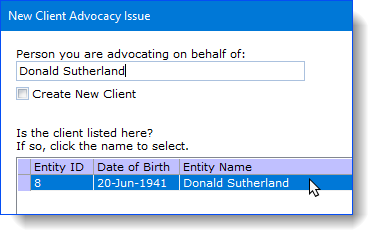
If one of the displayed names is in fact the client you're creating the issue for, you would just click on the name. For example, if your client was Donald Sutherland, clicking on his name populates the "Person you are advocating on behalf of" field with the whole name:
If, on the other hand your client is not in the system, Ivo will alert you to this by replacing the suggested matches with some input fields in which you can enter the personal details of your client. For example, if the client name 'Donald Bradman' is entered, as soon as the 'B' is entered, Ivo recognises that it has no matches, and instead, starts entering the name as a new client record:
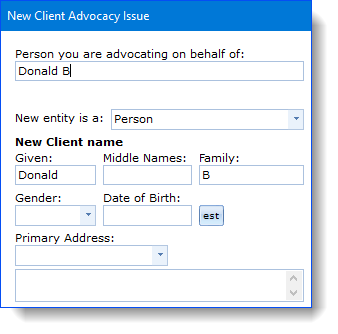
Note that Ivo will also assist you in the process by using the text you enter to automatically split the data into the Given and Family Names fields:

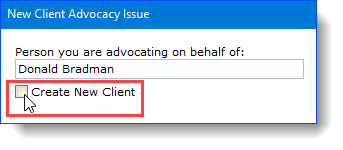
If there is already another client in Ivo with the same name, but you still need to create a new record for a different person, you can check the "Create New Client" check box:
Remember that Ivo looks at all the records in the system when searching - so just because you haven't worked with a person before, that doesn't mean they won't already be in the system.
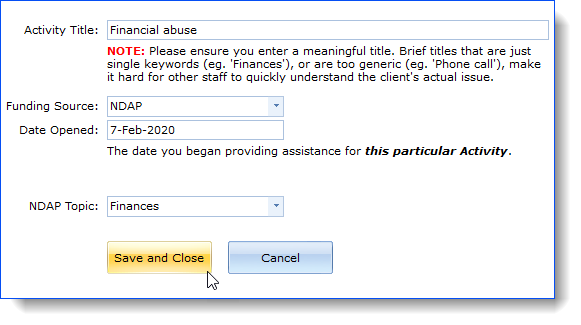
Once you have specified the client, you can move on to the details of the issue itself, and hit the Save and Close button.
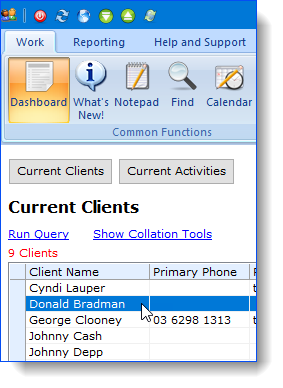
On saving the record, Ivo redirects you to the Manage Clients screen where you can select your new client and review, edit, and enter data. See the section on the Manage Clients screen for more details on this area.
If you move to the Dashboard screen, you'll now see you have an additional record, which you can recall if you wish, by double clicking on the client's name.
For the purposes of this introductory manual, you've learnt as much as you need to, to create most new records. Systemic Advocacy, Education Sessions, Inquiries, Waiting List, and General Activities records etc are all created in a similar way.
To add more data to the record as you continue working on the activity, see Step 3 - File Notes
Also, see the calendar for information on how to enter activity data around a time and date-oriented view.